Replication in OpenStack
About this lab
The purpose of this lab is to show how to use the Pure Storage FlashArray replication technology within OpenStack. This blog will combine both asynchronous (snapshot based replication) and synchronous (ActiveCluster) replication.
vTeam Specialization Program
Pure Storage nominated me recently to join the Pure Storage vTeam Specialization program for New Stack. The idea behind the program is, to create an active community within Pure Storage. Allowing Puritans to learn and develop their skills and grow into a subject matter experts.
The program consists of training and lab exercises that are focussed on developing experience in the New Stack space (Kubernetes, Ansible, Open Stack and more).
Since I think there are more people out there how want to learn more about New Stack, I will blog my progress in a series of lab exercises.
Lab instructions
The purpose of this lab is to use variables and facts from Ansible for building a more dynamic playbook.
| Name: | Replication – async/sync |
| Description: | Configure (a)sync replication for FlashArrays |
| Objective: | Create an (a)synchronously replicated volume in Cinder using two FlashArrays |
| Task #1: | Configure one Cinder backed to (a)synchronously replicate to another |
| Task #2: | Ensure the Cinder protection group / AC pod has been created on the primary array |
| Task #3: | Create a volume type for (a)sync replication |
| Task #4: | Create a volume that is async replicated to a second array |
| Task #5: | Change the replication parameters for the replicated protection group through Cinder |
| Success Criteria: | Volumes can be created that are (a)sync replicated |
In this lab, I actually combine two labs assignments in a single blog post. The assignments are setting up asynchronous and synchronous replication in OpenStack. I’ll be using the DevStack cluster that I’ve setup in the previous lab.
Setup Replication in OpenStack
The replication for OpenStack is handled by the storage layer, as opposed to for example QoS, which is handled by the hypervisor as we’ve seen here.
For this exercise we’ll be following the explanation from the Pure Storage OpenStack best practices guide, as it clearly describes the required steps for the setup.
Asynchronous replication
First we’ll setup asynchronous replication. Replication is configured in cinder.conf, where we need to add some parameters to our volume backend.
For this lab, we’ll use the cinder.conf that we created before, and add the following lines:
[puredriver-1]
volume_backend_name = puredriver-1
volume_driver = cinder.volume.drivers.pure.PureISCSIDriver
san_ip = 192.168.10.12
pure_api_token = xxxxxxxx-xxxx-xxxx-xxxx-xxxxxxxxxxxx
use_multipath_for_image_xfer = True
replication_device = backend_id:pure2-async,san_ip:192.168.10.15,api_token:xxxxxxxx-xxxx-xxxx-xxxx-xxxxxxxxxxxx,type:async
pure_replica_interval_default = 3600
pure_replica_retention_short_term_default = 86400
pure_replica_retention_long_term_per_day_default = 5
pure_replica_retention_long_term_default = 7
The replication_device line adds our target array. It contains four parameters, backend_ip: which is just a name for the target array, san_ip:, which points to the FlashArray management IP address of the target array, api_token: the API token for the target array and type: which specifies to use async (protection group based) or sync (active cluster based) replication.
For async replication we also want to specify the default replication interval, although these are optional. The parameters include the short term retention and long term retention and number of snapshots per day. In the example shown above: take a snapshot every hour (every 3600 seconds), keep for 24 hours (86.400 seconds) and then create 5 snapshots daily and keep those for 7 days.
Once we’ve change the configuration, restart our Cinder driver.
sudo systemctl restart devstack@c-vol.service
Now we can add a new Volume Type in Horizon:
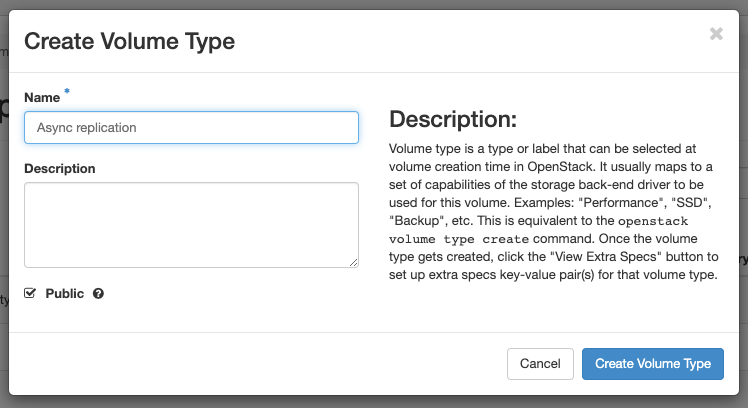
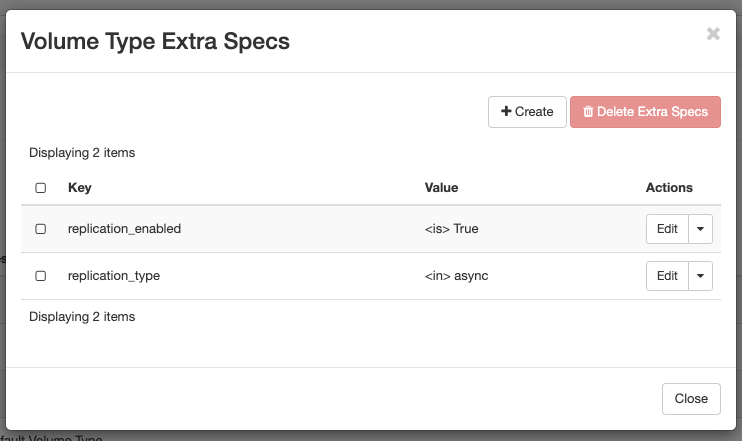
And add two Extra Specs
replication_enabled:<is> Truereplication_type:<in> async
As shown below. Make sure you use the correct capitalisation.
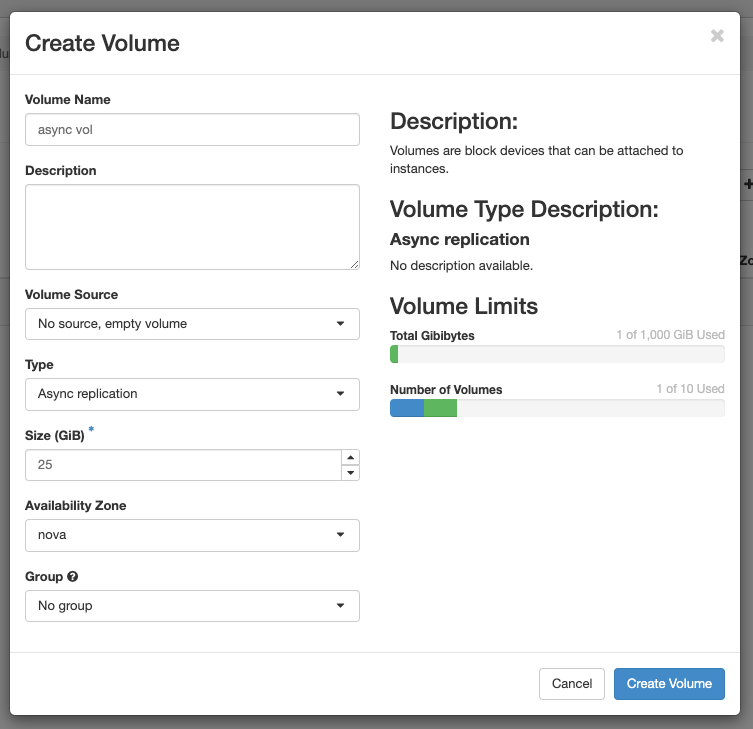
Now we can create a new Volume, select the new Volume Type and both the volume and protection group will automatically be created on the FlashArray.
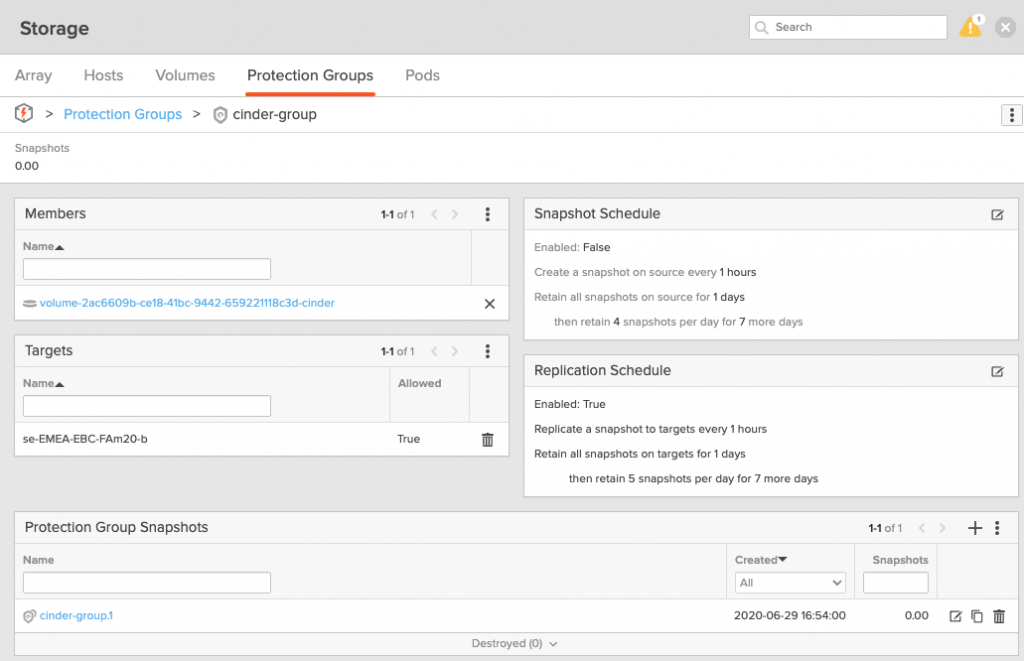
The screenshot below, shows the protection group with the replication schedule and the new volume that was added to the group automatically. Also it shows the first snapshot that was created.
Synchronous replication
Next we’ll setup synchronous replication in cinder.conf, just like the asynchronous replication.
We will just add the following line to our cinder.conf file:
[puredriver-1]
volume_backend_name = puredriver-1
...
replication_device = backend_id:pure2-sync,san_ip:192.168.10.15,api_token:xxxxxxxx-xxxx-xxxx-xxxx-xxxxxxxxxxxx,type:sync
The replication_device line adds our target array inexactly the same way as it did for the asynchronous replication. Only now we specify the type: as sync.
For sync replication we can only set the pure_replication_pod_name parameter if we want. If we don’t it will default to cinder-pod, which if fine for my lab.
Once we’ve change the configuration, we need to restart our Cinder driver again.
sudo systemctl restart devstack@c-vol.service
Now we can add a new Volume Type to Horizon, add two Extra Specs
replication_enabled:<is> Truereplication_type:<in> sync
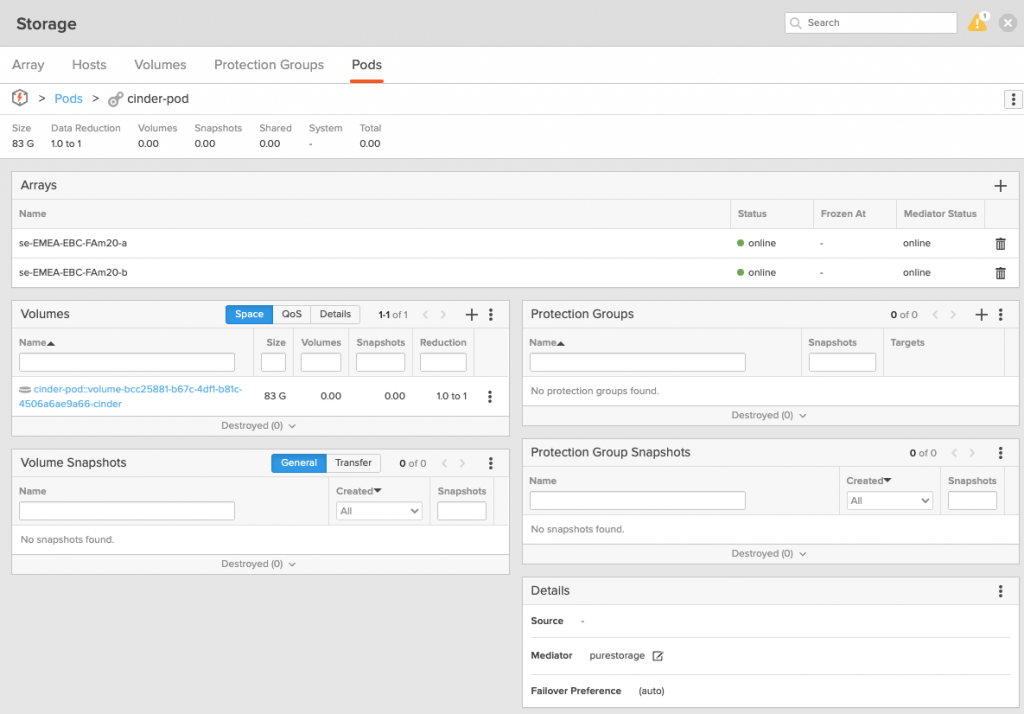
And create a new Volume.
Once done, we can check the FlashArray and we see the volume added to the ActiveCluster pod cinder-pod as expected.
And that’s all there is to it.
Troubleshooting
In case you make any typo’s or errors in the cinder.conf file, you might see an error when creating the volume. Also you might see the storage backend puredriver-1 report a down status. To troubleshoot what went wrong, check the Cinder logs using the following command:
sudo journalctl -f -u devstack@c-vol.service
Conclusion
This completes the setup of our replication. We’ve see how to setup both asynchronous and synchronous replication, where the Pure Storage Cinder driver automatically creates the required protection groups or ActiveCluster pods and adds any volumes to those when specified.
I hope you’ve enjoy the read and look forward to see you next time!