OpenStack Horizon
About this lab
vTeam Specialization Program
Recently I was nominated to join the Pure Storage vTeam Specialization Program for New Stack. The idea behind the program is to provide a community within Pure for Puritans to learn and develop skills and grow into a subject matter expert.
The program consists of training and lab exercises that are focussed on developing experience in the New Stack space (Kubernetes, Ansible, Open Stack and more). And since I think there are more people out there how want to learn more about New Stack, I though I’d blog my progress of the lab exercises.
Lab instructions
The purpose of this lab is to explore the OpenStack Horizon dashboard/GUI. and creating volumes and snapshots using FlashArray.
| Name: | OpenStack Horizon | Status |
| Description: | Use the Horizon interface to manage a FlashArray | |
| Objective: | Create volumes and snapshots on a FlashArray using only the Horizon GUI | |
| Task #1: | Log on to your Devstsck deployment through the Horizon GUI | |
| Task #2: | Create a Cinder volume | |
| Task #3: | Snapshot the Cinder volume | |
| Task #4: | Clean up the environment | |
| Success Criteria: | Successfully create a volume and snapshot and then clean the environment |
While this blog is a post on it’s own, I will be using the Open Stack environment that I’ve installed before using DevStack. Following on this lab and blog will be another blog around Open Stack, so if you like what you see, keep reading.
OpenStack Horizon
OpenStack Horizon is the graphical user interface of Open Stack. I can be used by the administrators or platform owners but also by users of the platform, since it provides a self service portal for all OpenStack features on the cluster.
In my last blog post we already briefly touched on Horizon, since we used it to create a Pure Storage volume. However, let’s go into a bit more detail.
Cinder backends
First let’s check our Pure Storage cinder implementation. For this we will login to the Horizon dashboard:
https://192.168.10.155/dashboard
Where you’d need to replace the IP address with the one you used for your environment. Login with the credentials you created for the environment during the installation.
Next go to Admin -> Systems -> System Information and select the tab Block Storage Services
This should give a view much like the one below:
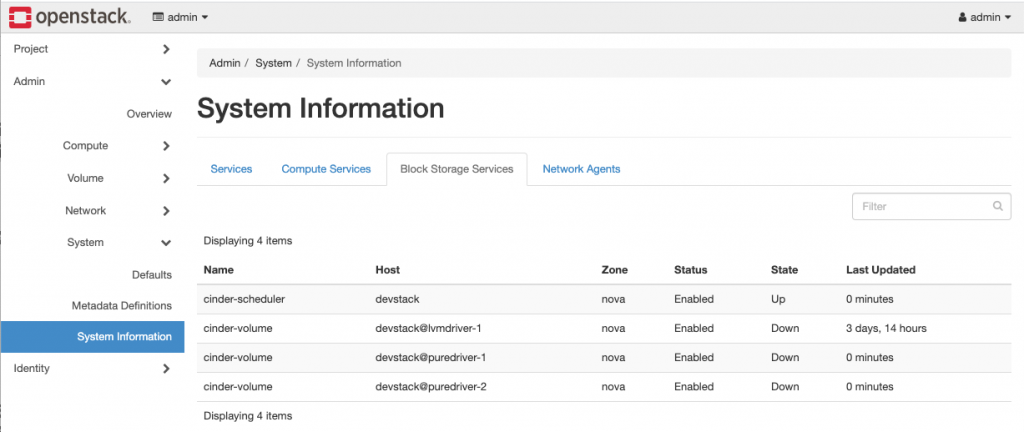
I added two backends to my configuration in the last blog, and both of them should show as State Up and Status Enabled. As you see in my case the state is down, which is due to me restarting my test environment (including bringing down my lab FlashArray systems). Easy enough to solve, once you FlashArrays are up again, login to the devstack server and execute:
sudo systemctl restart devstack@c-vol.service
This will restart Cinder after which the backends are active.
Volume types
The next task for the lab is to start creating volumes, but I will add a small side step, that I think might be interesting. I have added two block storage backends, and when I will create volumes, I might want to be able to specify which of the backends to use. For this I’ll first specify two Volume Types in Open Stack.
Navigate go to Admin -> Volume -> Volume Types
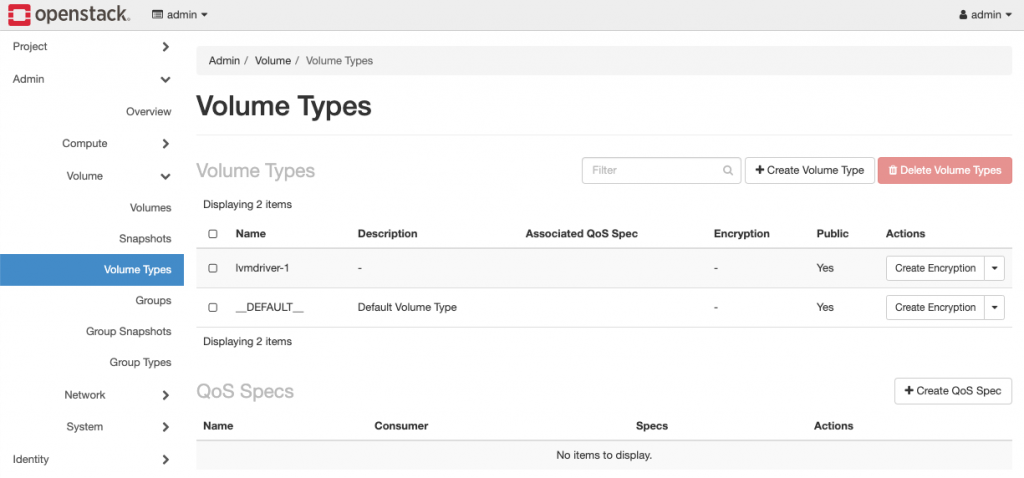
We see the __DEFAULT__ volume type, which we used in the previous lab and a lvmdriver-1, enabled by the devstack installation.
- Click on + Create Volume Type
- Specify a name, I’ll use Pure 1
- Click on the Create Volume Type button
We now have a new Volume Type, however we still need to make sure that the correct block storage backend is selected when using this Volume Type. For this we need to add so-called Extra Specs.
Click on the drop down array on the right of the newly created Volume Type and select View Extra Specs
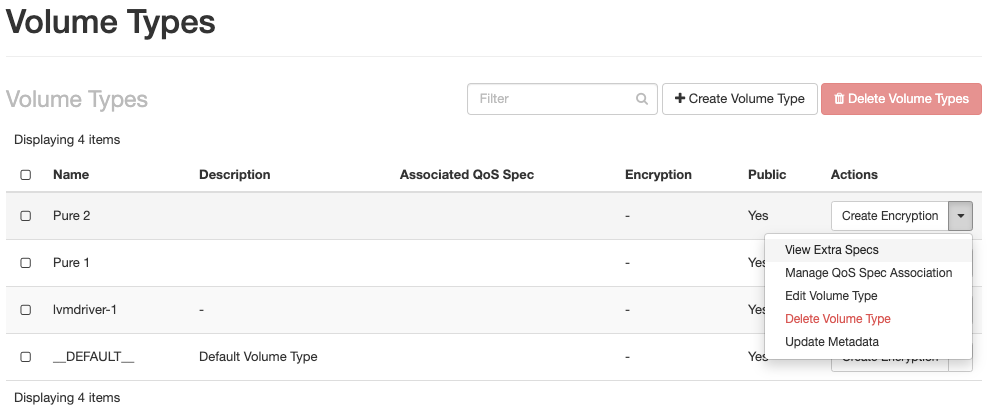
A pop-up will appear, allowing you to enter a Key/Value pair for the Volume Type
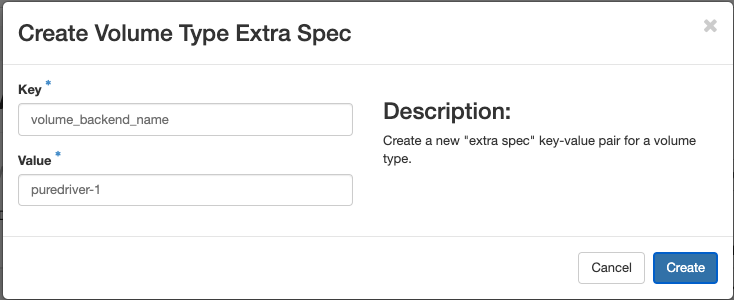
We will add volume_backend_name and set the value to our first backend puredriver-1.
Now repeat the steps above for Volume Type Pure 2 and backend puredriver-2.
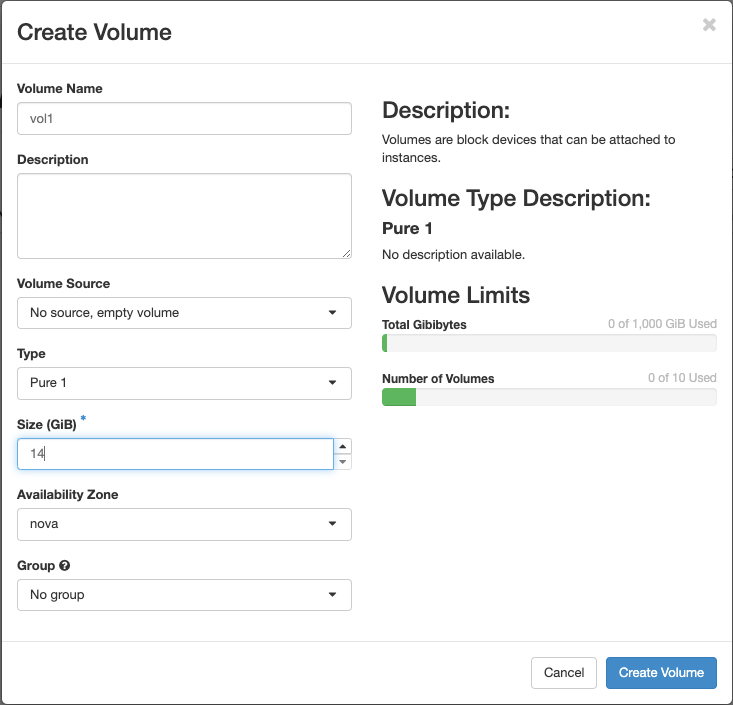
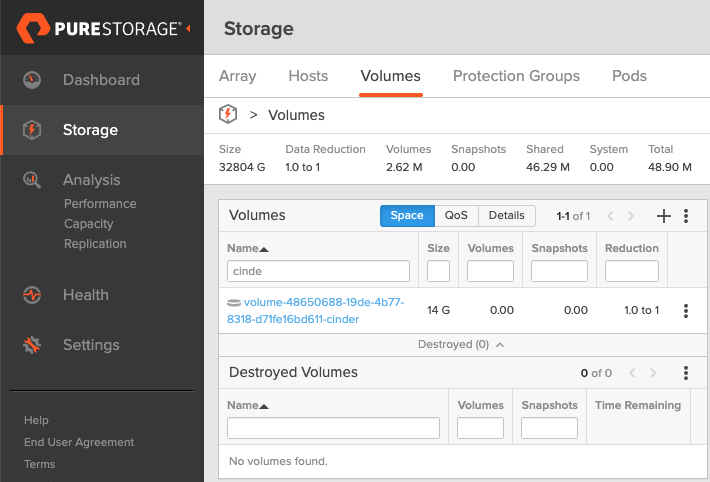
You can now navigate to Projects -> Volumes -> Volumes and create a volume using the Volume Type Pure 1 and Pure 2 respectively, and you’ll see that these volumes are created on the configured block storage backends.
Using snapshots
Now that we have created some Volumes and Volume Types, let’s move on to Snapshots. As you’d expect this is fully integrated with OpenStack, so all you need to do is the following.
- Navigate to Project -> Volumes -> Volumes
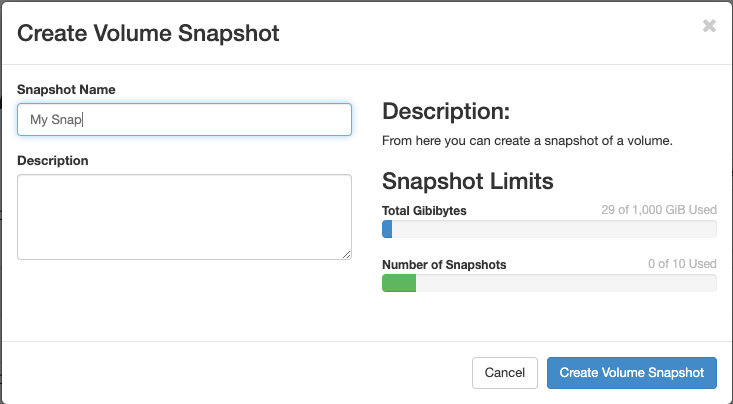
- Use the drop down menu on the right of one of the volumes and select Create Snapshot

- Enter a name for the snapshot and click Create Volume Snapshot
Now let’s head over to our FlashArray and check the volume
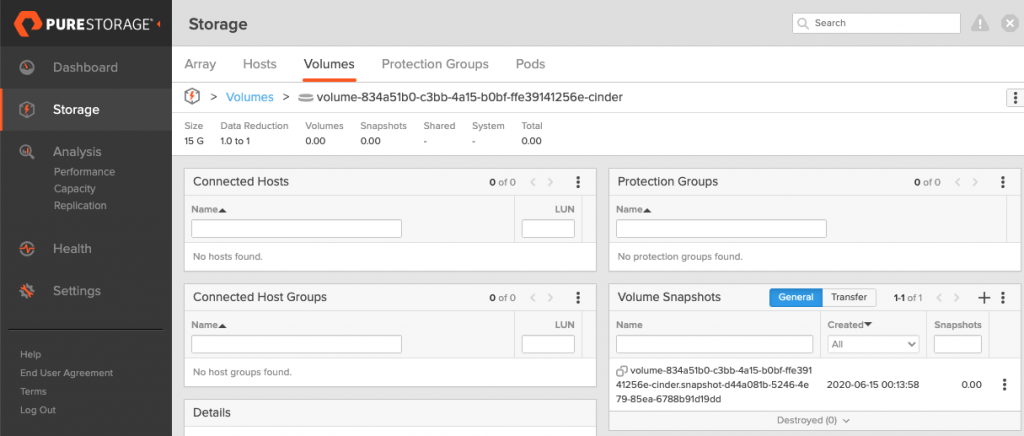
As we can see above a native storage snapshot was created for the volume by the array.
Finishing off
The final task is to clean-up the environment. In this case, I believe it means deleting the volumes we’ve created.
Deleting a volume (or any object) is only allowed in OpenStack if there are no child objects associated. So the first step it to delete all Snapshots, then we can move on to delete all Volumes.
- Navigate to Projects -> Volumes -> Snapshots
- Select all Volume Snapshots and click Delete Volumes Snapshots
- Navigate to Projects -> Volumes -> Volumes
- Select all Volume Snapshots and click Delete Volumes
I’m not going to remove the Volume Types I’ve created. You could do that using the same steps as mentioned above. Make sure there are no more volumes that were created by the Volume Type you wish to remove and then remove it.
Conclusion
And that’s it for this lab. Thanks once more for reading along. I hope it was useful and see you in the next lab.
One thought on “OpenStack Horizon”
Hey thank you,
Your Articles about Openstack are useful.