Kubespray (part 1/3): Install Ubuntu 20.04
About this lab
vTeam Specialization Program
Recently I was nominated to join the Pure Storage vTeam Specialization Program for New Stack. The idea behind the program is to provide a community within Pure for Puritans to learn and develop skills and grow into a subject matter expert.
The program consists of training and lab exercises that are focussed on developing experience in the New Stack space (Kubernetes, Ansible, Open Stack and more). And since I think there are more people out there how want to learn more about New Stack, I though I’d blog my progress of the lab exercises.
Lab instructions
The purpose of Lab 1 is to build a vanila Kubernetes cluster using Kubespray.
| Name: | Install Vanila k8s using Kubespray | Status |
| Description: | Build a 3 node k8s cluster using kubespray installed on a seperate control node | |
| Objective: | Have a 3 node kubernetes cluster running with no added bells or whistles | |
| Task #1: | Ensure all 4 nodes are fully patched with latest software packages | This blog |
| Task #2: | SSH communication between hosts is established | Blog part 2 |
| Task #3: | Install prerequisite software for kubespray on control node | Blog part 3 |
| Task #4: | Clone the kubespray repo on your control node | Blog part 3 |
| Task #5: | Create Ansible inventory for 3 node kubespray deployment | Blog part 3 |
| Task #6: | Customize kubespray to enable helm install and volume snapshot and volume cloning feature gates in 3 node k8s cluster | Blog part 3 |
| Task #7: | Deploy kubespray | Blog part 3 |
| Task #8: | Check k8s and helm versions on deployed cluster | Blog part 3 |
| Success Criteria: | 3 node Kubernetes cluster running at 1.17.3 with Helm 3.1 installed. All necessary features gates are open | Blog part 3 |
I’ll be splitting this lab into a three part blog series, the first blog (this blog) will be about installing Ubuntu server. The second one will be about deploying and preparing the VM’s that will used to install Kubernetes and the third and final one will focus on Kubernetes deployment using Kubespray.
Download Ubuntu
The first step to install Ubuntu is to download the software, which is where you’ll have to make the first choices. Ubuntu releases can be found here:
https://releases.ubuntu.com/
There you can select the version you want and the image type you need (eg. Desktop of Server).
Choosing the Ubuntu version and image
To choose the correct version, it might be useful to get to know the release cycle of Ubuntu. Basically the releases are versioned as YY.MM. YY for the year of the release and MM for the month of the release.
In addition the even YY numbers (eg. 14, 16, 18 and 20) are released in so called Long Term Support (LTS) releases and are considered most stable. The uneven YY releases are considered interim releases and have shorter support.
Since this post is about building a production grade Kubernetes cluster, we will choose a LTS release and since I’ve not worked with 20.04 that just came out, I thought that would be a nice challenge. Also we will choose the Server install image to permanently install Ubuntu on our systems.
WORD OF CAUTION!
I’m using Ubuntu 20.04 just because I can, however as you can see in part 3 of this blog, Ubuntu 20.04 is at this moment not yet fully supported by Kubespray. So unless this has changed, you might be better of using Ubuntu 18.04 instead of 20.04. The steps for 18.04 will be almost identical to 20.04 as described here.
Since I’m using VMware for my lab environment, I’ll use the ISO installer, which can be downloaded here:
https://releases.ubuntu.com/20.04/
Installing Ubuntu server
Create a Virtual Machine
For the lab I’ll be installing Ubuntu server 20.04 on VMware vSphere. I will not cover the steps to create a VM, but will highlight two pieces.
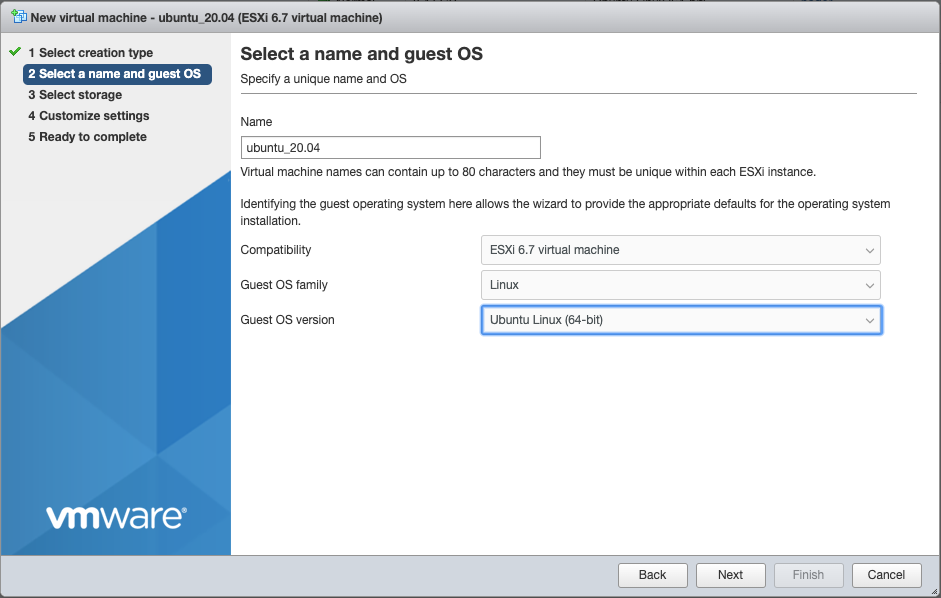
- Give the VM a name, I’ll use ubuntu_20.04
- Select Ubuntu Linux (64-bit) as Guest OS
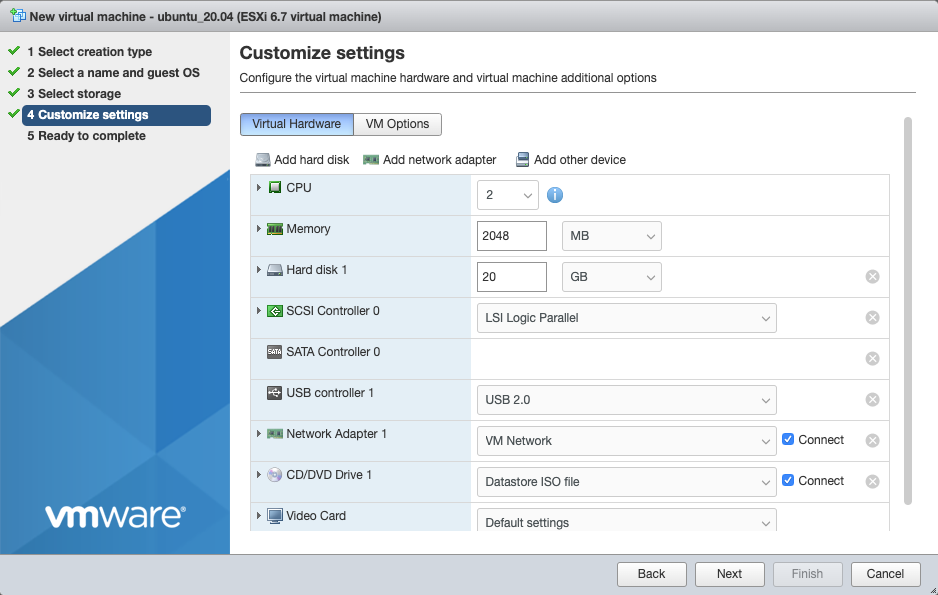
Since the VM will be used for Kubernetes we will use the following virtual hardware settings:
- CPU: 2 virtual cores
- Memory: 2048 MB
- Hard disk 1: 20 GB
- Network adapter 1: <Select your network>
- CD/DVD Drive 1: <Select the ISO file you downloaded earlier>
Run the setup
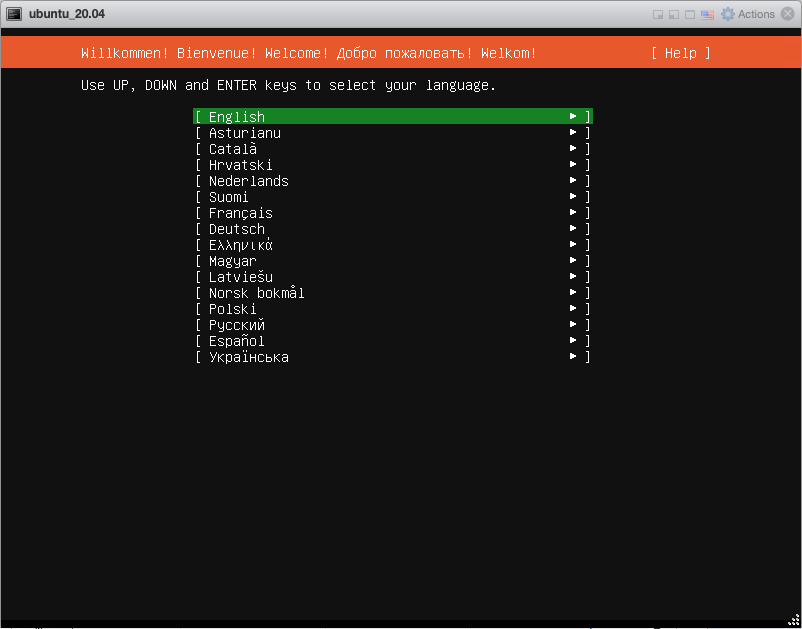
Power on the VM and run through the setup.
- Select your language, I’ll use English
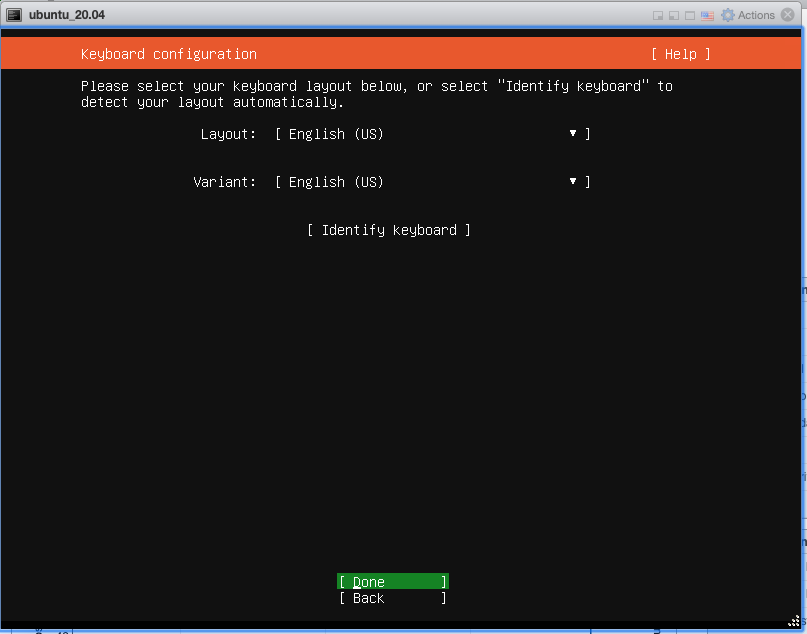
- Select the keyboard Layout to use:
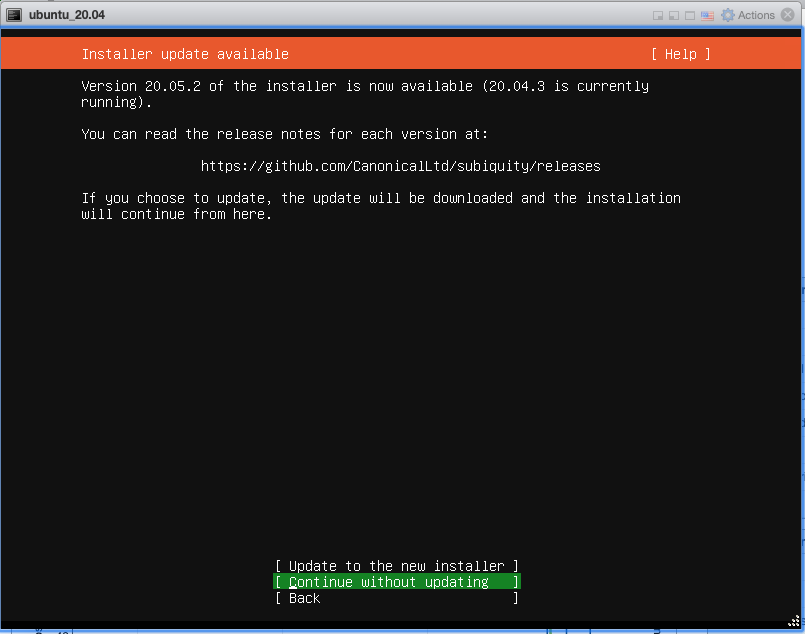
- The installer tries to use and install the latest version. I select to update the installer by choosing Update to the new installer
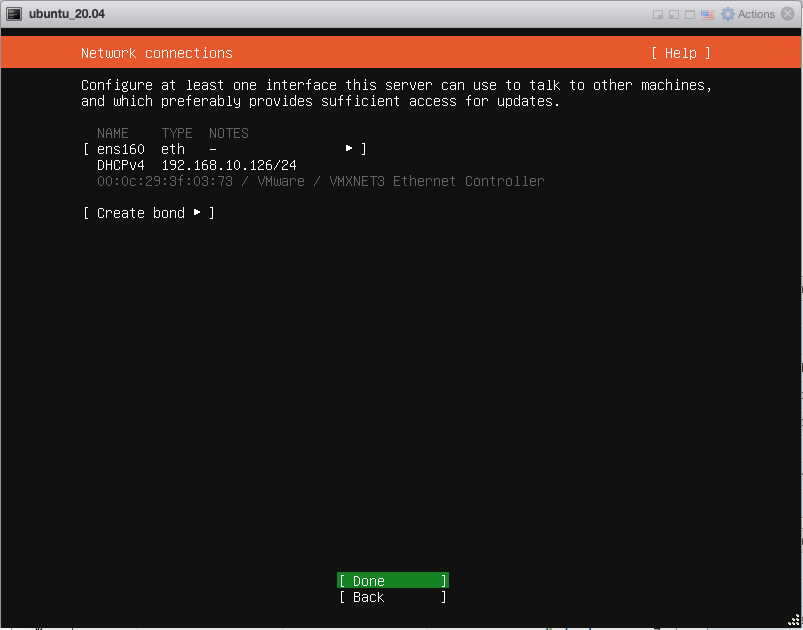
- Set your network settings. I’ll use DHCP, since I’ll use this VM as a template to deploy my Kubernetes nodes, so I’ll set fixed IP addresses later.
- Write down the DHCPv4 address mentioned, since we’ll need this to SSH into our server later.
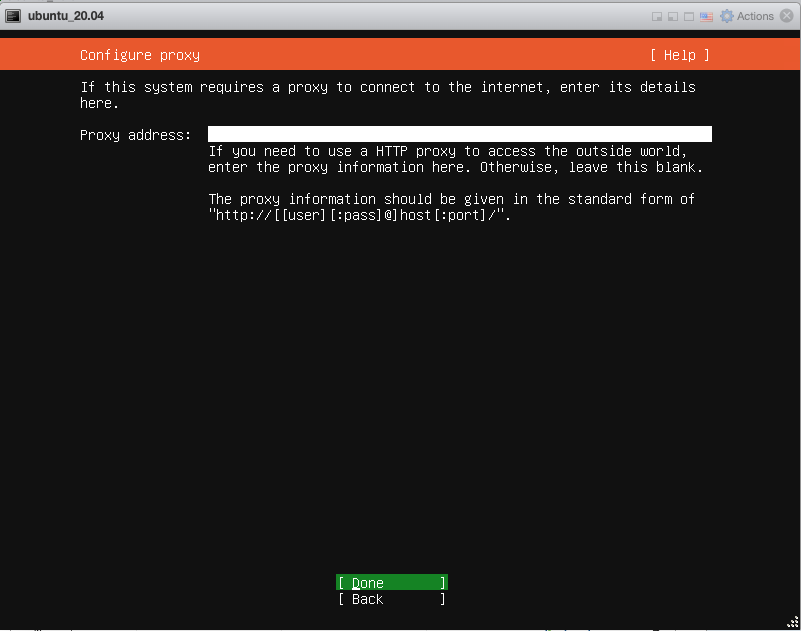
- If you need set a Proxy server for internet access
- Accept the default mirror address to download the Ubuntu software from

Hard disk partitioning
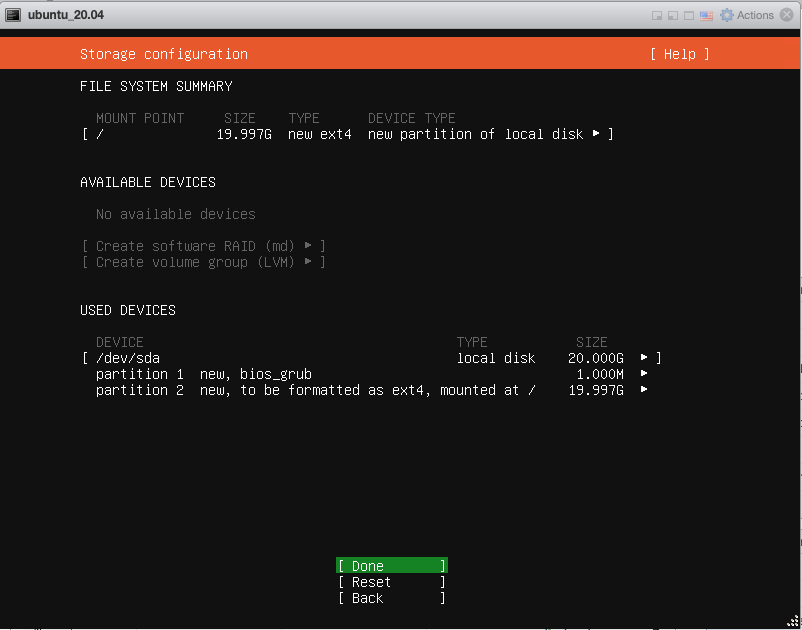
While most of the settings of the setup are trivial, drive partitioning deserves some special attention. Personally I will generally partition the drive of my Ubuntu server as a single partition for any development or test environment, since I don’t need to think about sizing and such. However if you’re deploying a production server, it might be wise to create separate partitions to avoid issues if the partition fills up.
Generally people will create a separate partition for the log files (/var/log), so that if the logs suddenly start to grow, the servers doesn’t run out of disk space that is used for other applications. Eg. the database and log files of a database server would not be affected. In addition after the installation, you might want to add external storage or additional drives specific to the application(s) your running on your server, eg. a dedicated disk for the database server mentioned earlier.
- For my environment and the intended Kubernetes workload, I feel comfortable to not partition the disk and just use the default settings.
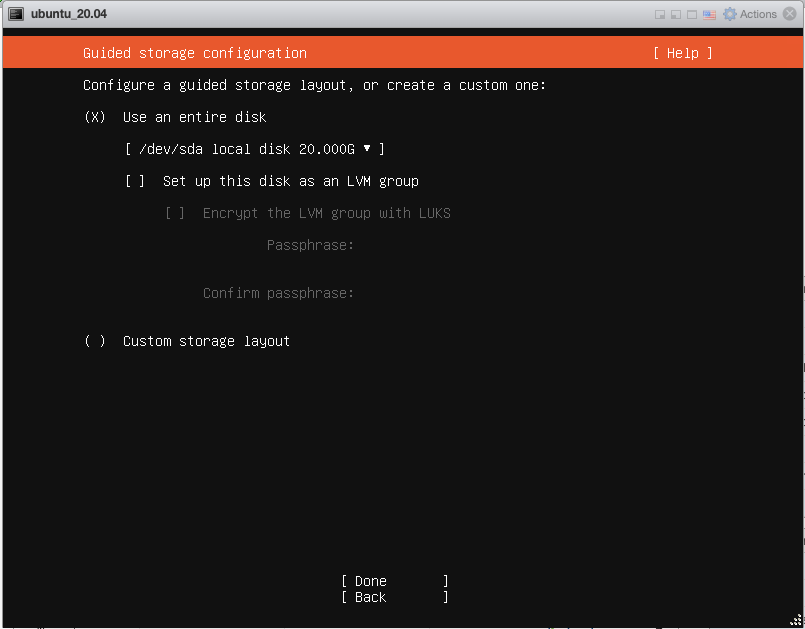
- The setup will show a summary of my partitioning scheme for a final review
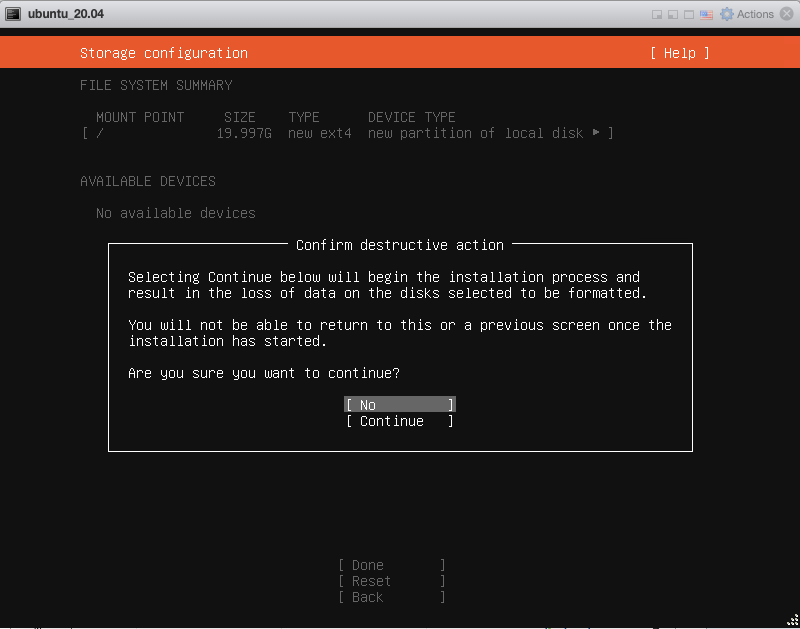
- Finally the installer will ask confirmation to start, since the setup will remove all data from the (virtual) drive.
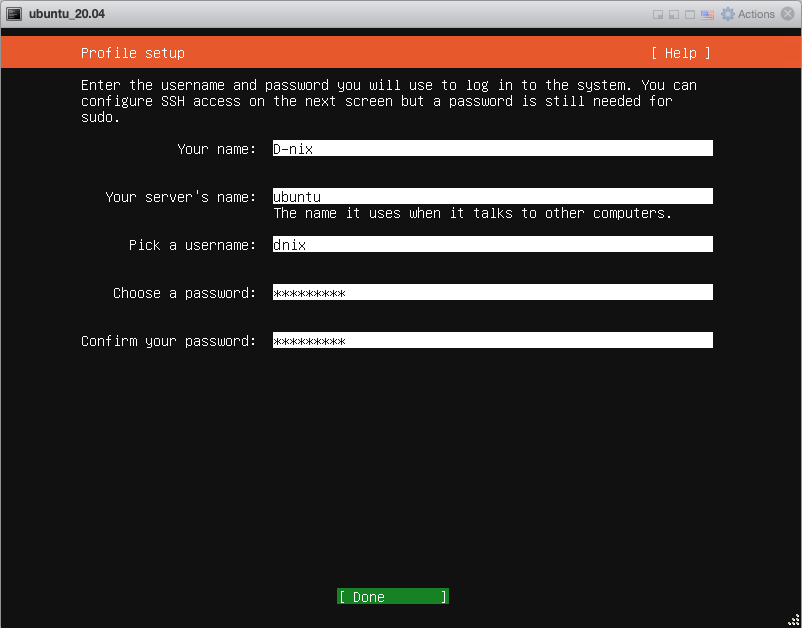
- Enter your full name and login credentials you wish to use for the server
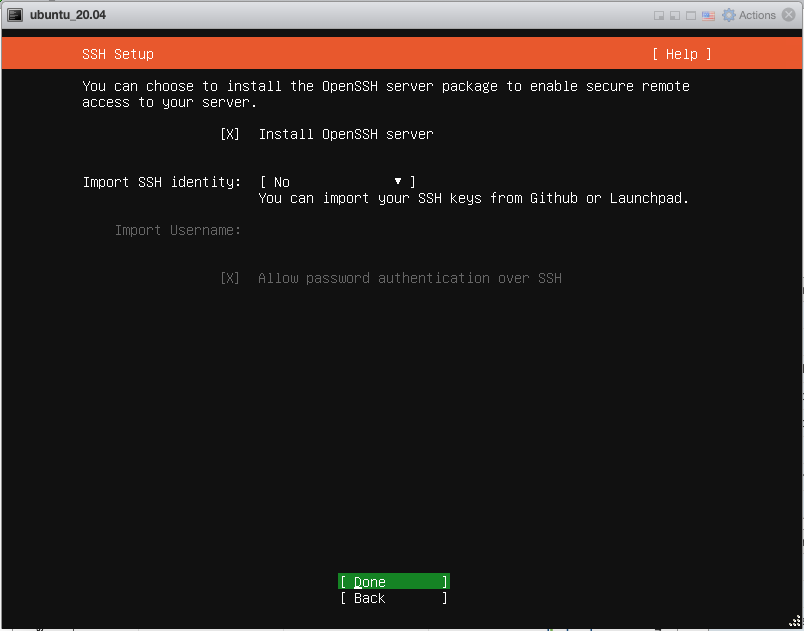
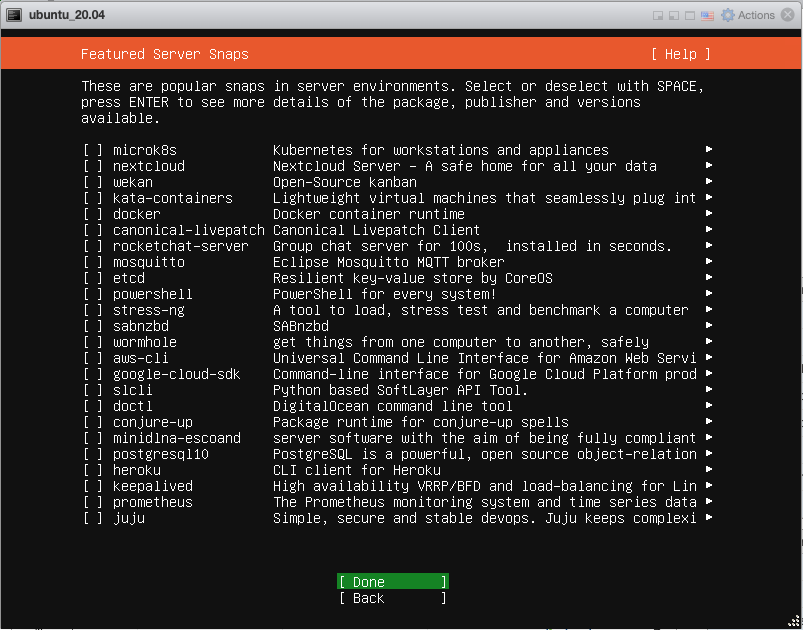
- Make sure you install the OpenSSH server, since this will allow you to login via SSH once the server is installed. For the Kubespray deployment we’re planning in this lab, SSH is required.
- The installer allows you to install additional software, but since this is a template VM, it’s better to install as little as possible, so we’ll not select anything.
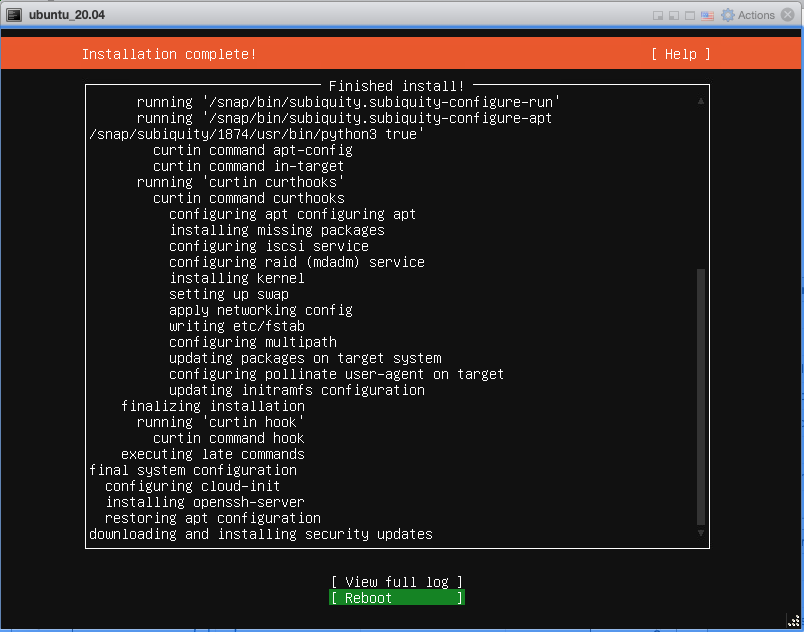
- Once the installation is done, select Reboot to restart the server and start using it.
Update software
Now that we have our server installed, we should be able to SSH into our server. Use the DHCPv4 address that you’ve written down earlier.
Connect using SSH from MacOS
- If you’re using Mac open a terminal window and enter the following (replace dnix with your username and 192.168.10.126 with your IP address):
ssh dnix@192.168.10.126
- Enter the password you used during the installation.
Connect using SSH from Windows
- If you’re using Windows download and open Putty
(https://www.chiark.greenend.org.uk/~sgtatham/putty/latest.html) - Enter the IP address of the server and select SSH as connection type
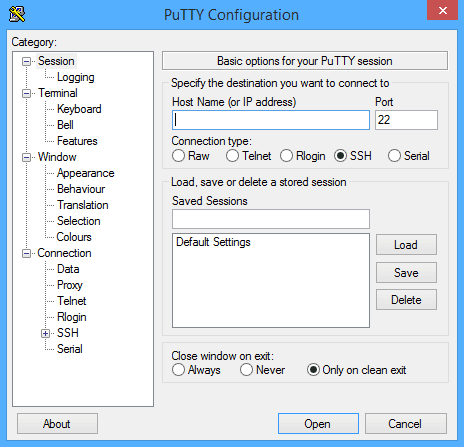
- Login on the server using credentials you entered during the installation
Install the latest updates
Use the following commands to update the software packages on the server to the latest releases.
sudo apt-get update
sudo apt-get upgrade
Conclusion
With that we have completed the installation of the Ubuntu server and made sure it contains all required updates and patches.
In the next blog of this series, I will clone multiple copies of this template Ubuntu server and prepare those for Kubespray to deploy Kubernetes.
You can now continue with part 2 of this lab!