Using vVols with the Pure Storage HTML5 client
Notice: As of July 29th, 2019 (yes, just 3 weeks after the previous version) a new version of the plugin, version 4.1.0, was released. This version has full support for vVols within Pure Storage, making this article irrelevant. More info in this article. I left this article for review purposes only.
On July 3th Pure Storage release the all new HTML5 plugin for VMware. Great news, since the VMware HTML5 client works so much better than the Vmware FlexClient. Read all about it on the official Pure Storage blog:
So when I was doing a PoC last week, I wanted to show off the new plugin to the customer. However there is one small downside to this version, since this initial release of the HTML5 plugin, does not support the creation of a vVol datastore. While this feature will be in a next release, this shouldn’t stop us from using the plugin, as the creation of the vVol datastore (and VASA connection) is just a one time action. Once the datastore is created, creating VM’s on the vVol datastore is done using native VMware functionality.
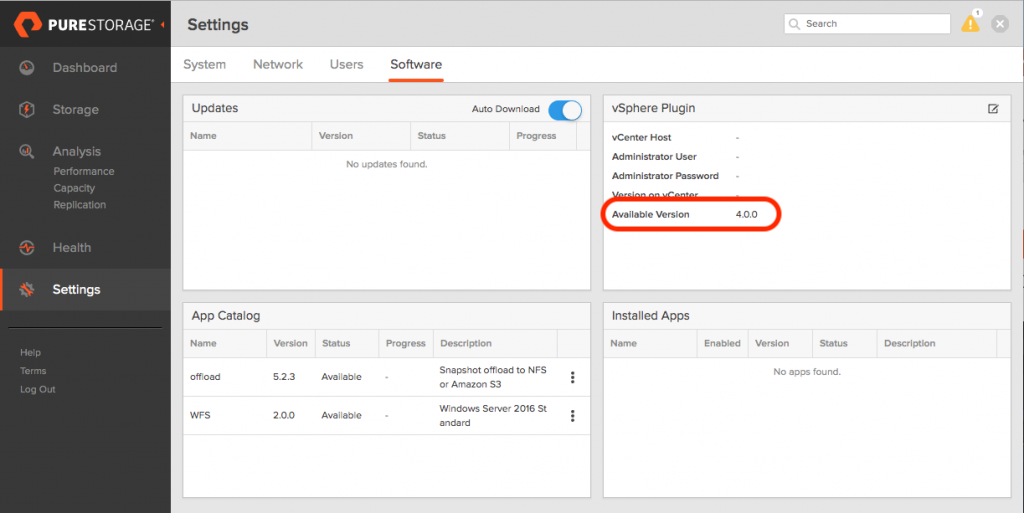
The first step to take is to have support update the plugin on the array, so that the version the plugin version is 4.0.0 as shown below.
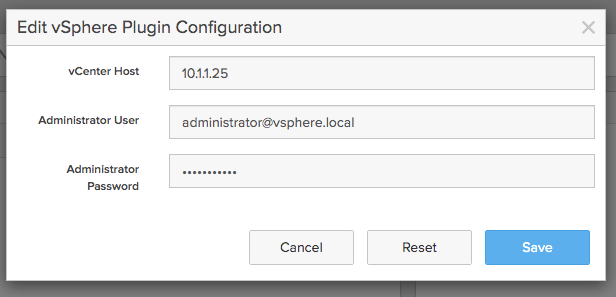
The next step is to install the plugin, to do this we need to enter the IP address or FQDN for the vCenter server and administrator credentials and click Save.
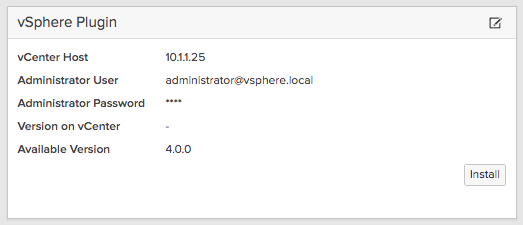
The array will connect to the vCenter server and detect the current version of the plugin on vCenter, or as in my case detect that there is currently no plugin installed.
Click on the Install button to install the plugin.
Once the plugin has been installed, you will see the following message in the VMware HTML5 client, stating that the plugin will be ready after you logout and log back in again.

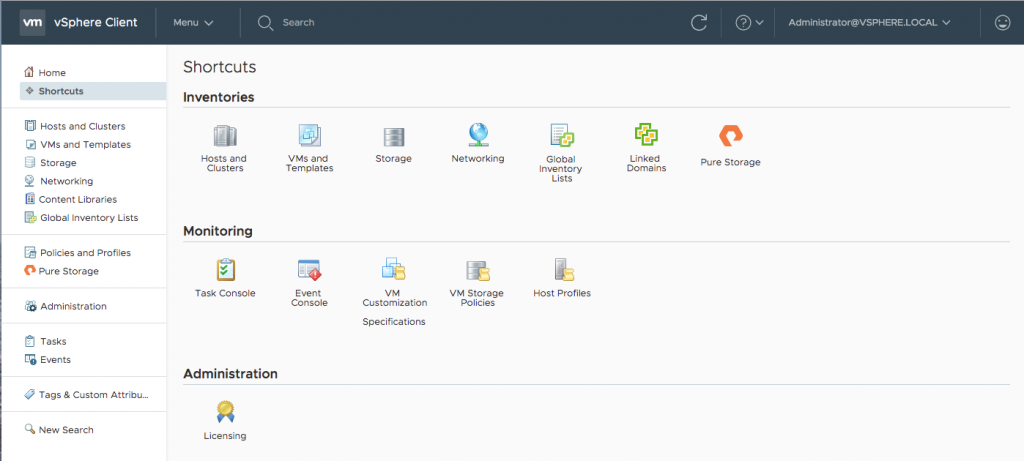
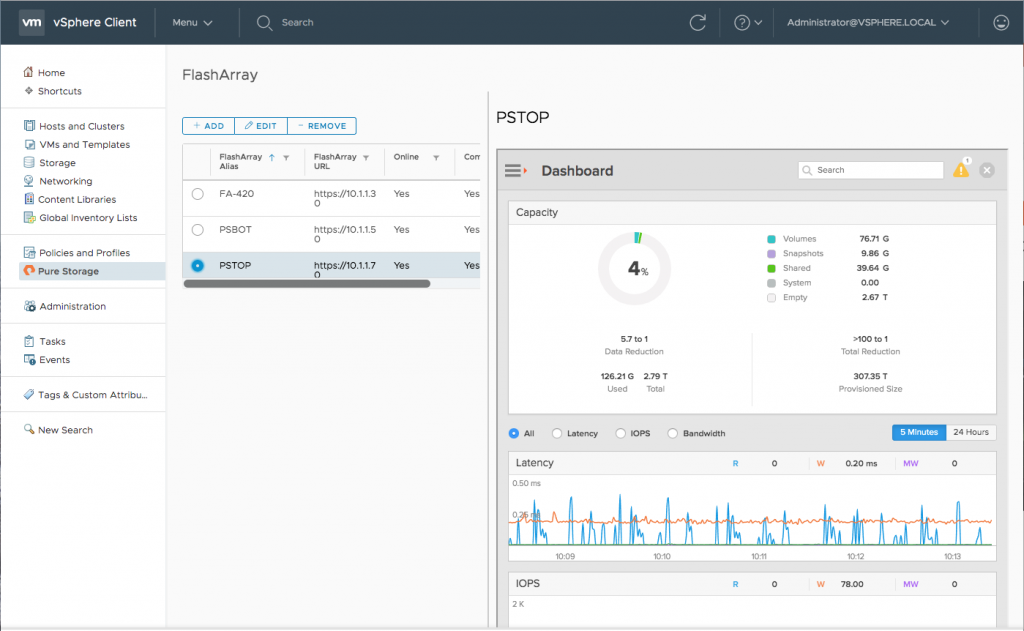
Once you’ve logged in again if you navigate to Shortcuts a new icon called Pure Storage will be listed in the Inventories category.
Once we click on this shortcut, we can add any Pure Storage array that we wish to manage via the plugin as shown below. With this step completed, the plugin installation is finished and you can provision datastores, create snapshots, mount datastores on additional hosts, view array level and volume level details of the storage system.
However since I wanted to demonstrate vVols, I wasn’t done yet. The first step is to register the VASA provider, which runs on the FlashArray controllers. The VASA provider is integrated with the controller and always active, so there is nothing to do to setup or confige. All we need to do is tell vCenter to connect to the provider and we are done.
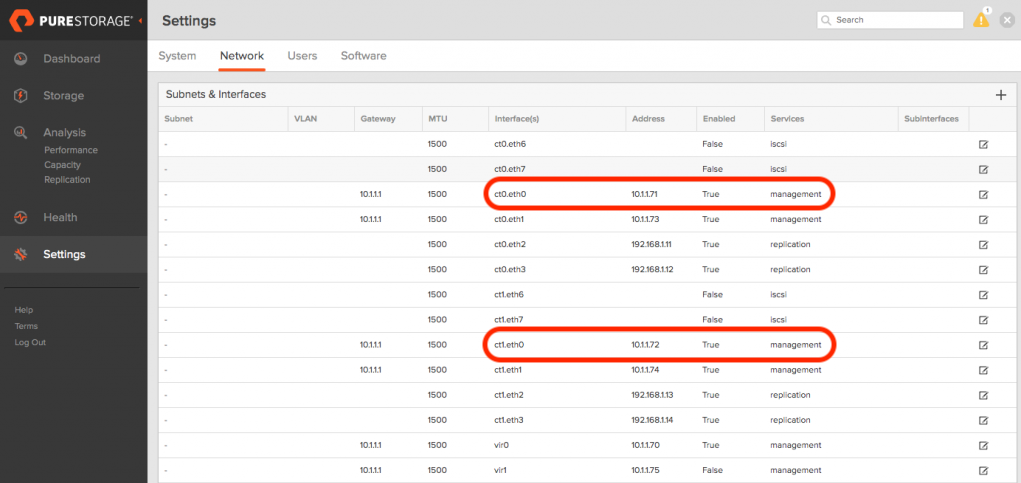
Since each controller runs a separate VASA provider for redundancy, we need to note the IP address for each of the controllers for the Eth0 management port.
Now we need to add the VASA connection on the vCenter server to the two controllers. To do this, select the vCenter server from the navigation pane, select the Storage Providers link from the Configure tab and click the Add button.
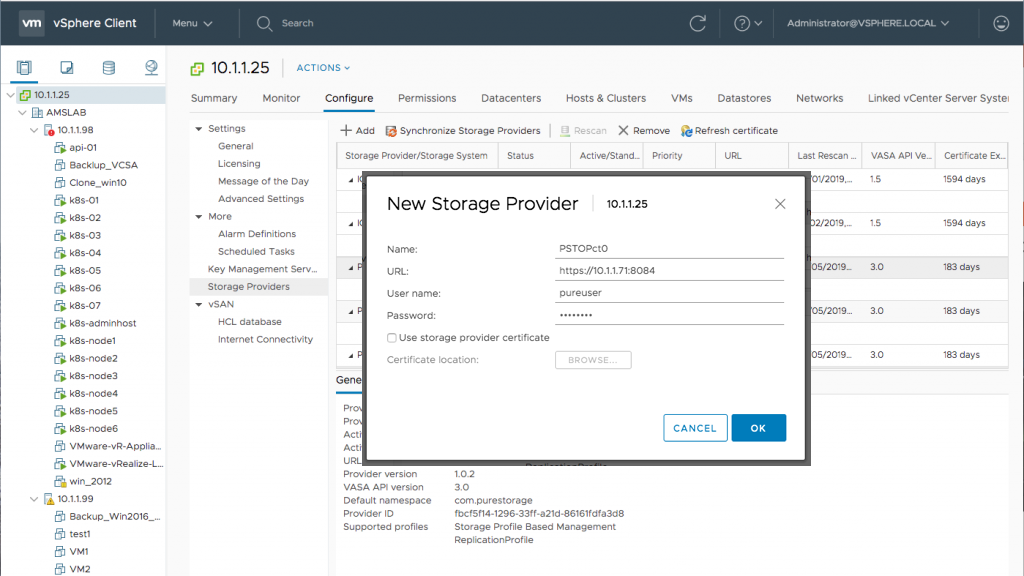
Add two Storage Providers, one for each FlashArray controller. Enter the following info to create the connection:
Name: {Any name you like, I use hostname-ct0 and hostname-ct1}
URL: https://{IP or FQDN}:8084
User name: {FlashArray username}
Password: {FlashArray password}
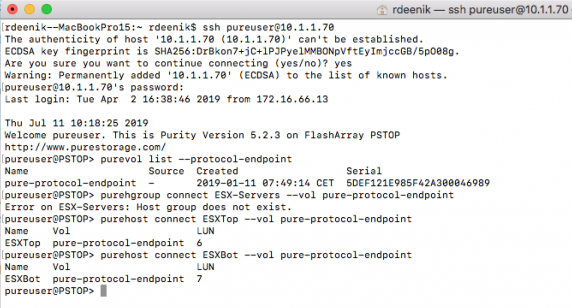
Now the final step is a bit tricky, since this involves a bit of command line on the FlashArray. We need to connect the ESX hosts on the FlashArray to the protocol endpoint, which is used to enable vVols.
The connection can either be made by using a hostgroup or on a per host basis. However the hostgroup of hosts need to be created on the FlashArray before starting this procedure.
When using a hostgroup, connect via SSH to the FlashArray and execute the following command’s, where ESX-Servers needs to be replaced with the correct name of the hostgroup that you use.
purevol list --protocol-endpoint
purehgroup connect ESX-Servers --vol pure-protocol-endpoint
When connecting single hosts, connect via SSH to the FlashArray and execute the following command’s, where esxhost needs to be replaced with the correct name of the hostgroup that you use.
purevol list --protocol-endpoint
purehost connect esxhost --vol pure-protocol-endpoint
The following screenhost shows the output from my setup, using a single host connection:
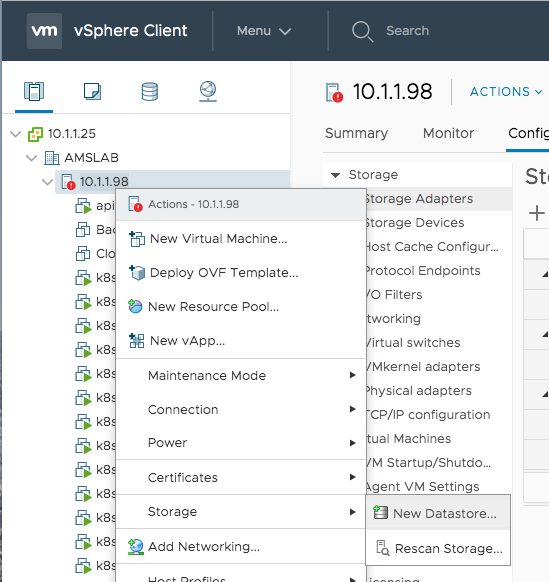
Now that we have registered the VASA providers on vCenter and connected to protocol-endpoint on the FlashArray to our hosts, the next step is to create a vVol datastore.
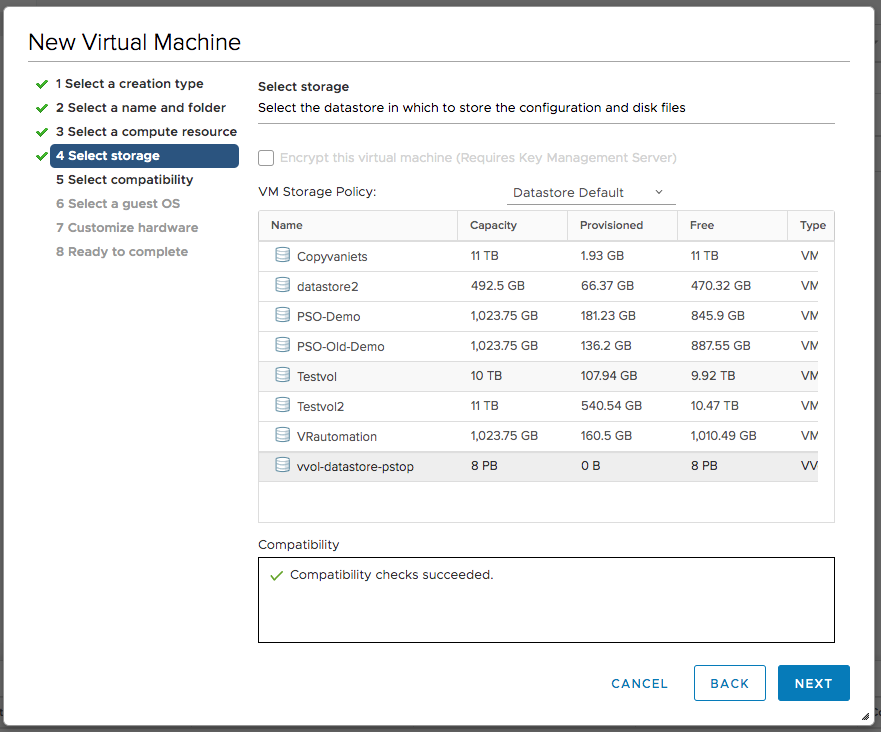
I created the datastore on host level, using the VMware HTML5 client.
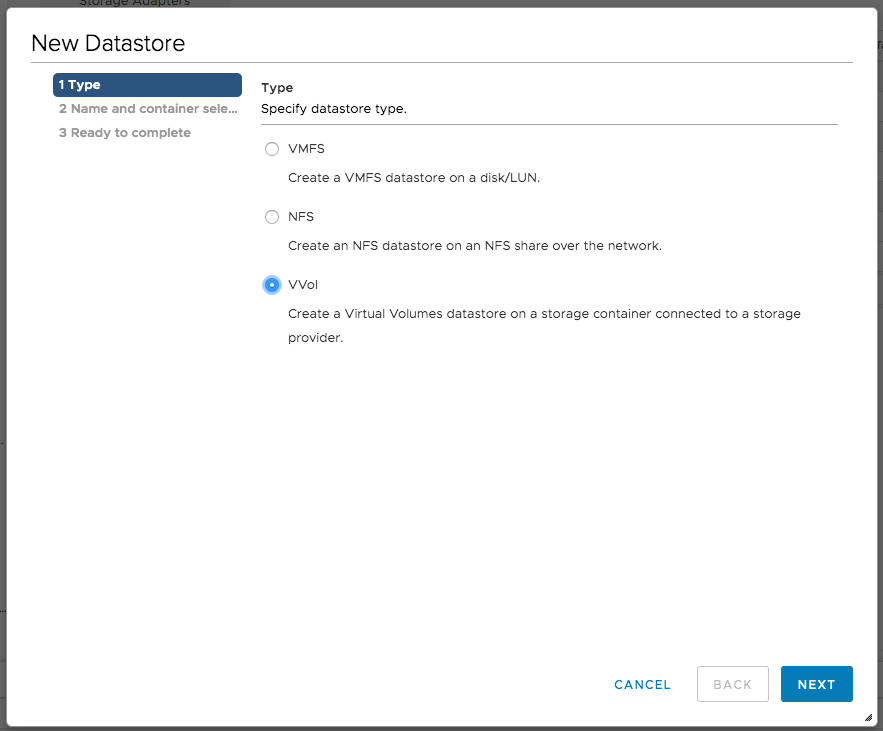
The type of the new Datastore is vVol
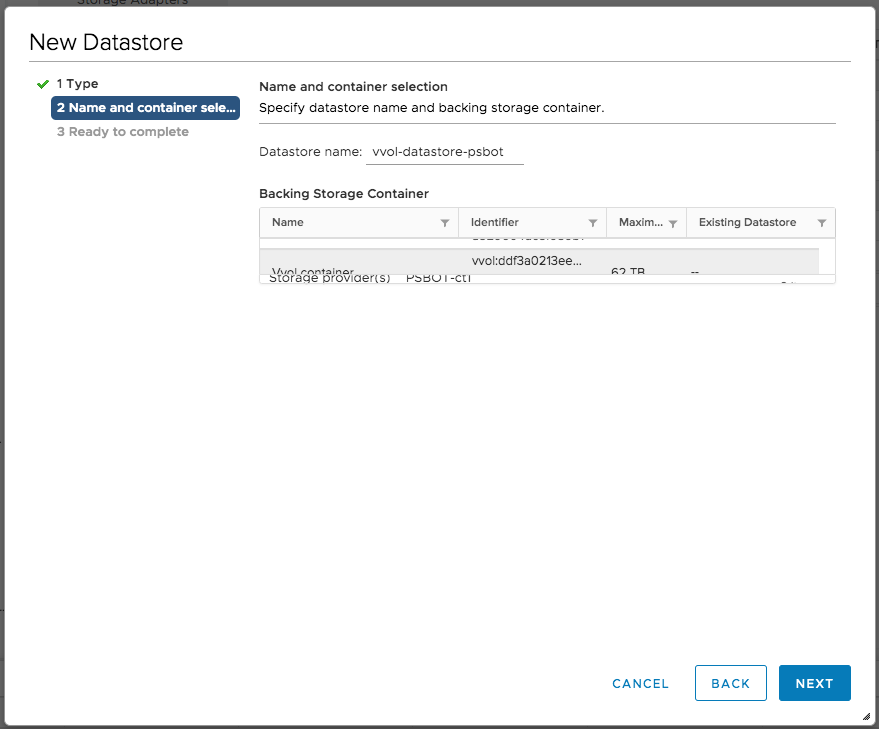
Select the correct protocol-endpoint, for some reason my Chrome session shows a bit strangely small listbox, however you are able to select different arrays from the list.
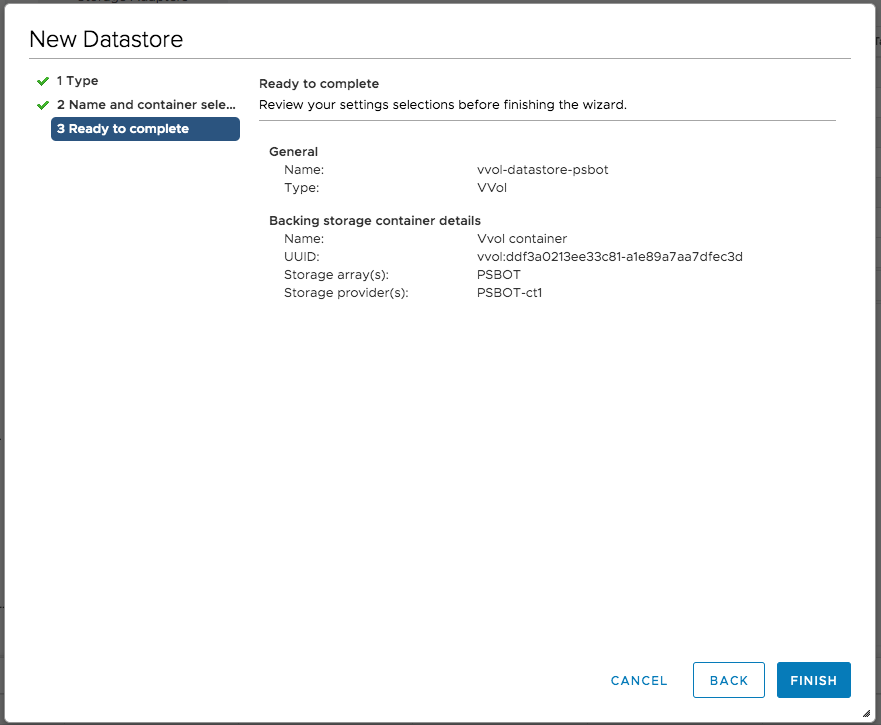
Check the info and click Finish.
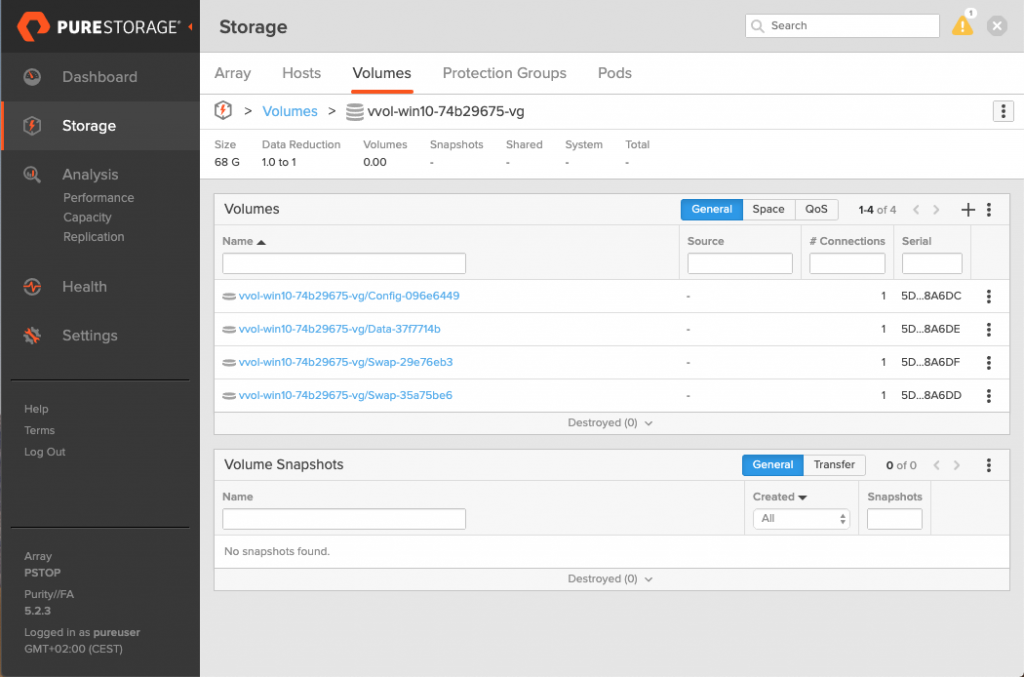
We are now done with setting up vVols using the HTML5 plugin. From now on for any VMware that we create of storage vMotion, we can select the vVol datastore that we created as a destination.
Once a VM is created or moved to the vVol datastore a volume group will be created with the name of the VM. This volume group will contain all volumes for the VM. Since vVols on a FlashArray are no different from other volumes, you can do everything you are used to on these volumes, like replication, snapshots, etc.
Hope you liked this post, and also that you like the new HTML5 plugin!